Oooh. A Tron patch would be pretty cool. I'm sure they have fluorescent material that would glow as you were playing a Tron game, and I know they have material you can use to make it glow in the dark too!
Any interest in a Tron patch? I'd buy my standard 5...so we need 45 more takers if you guys want this to go ahead.
"My power comes from my boundless rage"
** Getting Out **All that's left: (Vids) Bubbles**MAKE AN OFFER!**
Here are some of the tools I used to apply the new CPO:
Spray the surface of the metal control panel lightly with windex. This acts as a surfactant, and makes the CPO easier to move around. Some people like to use soap and water. It's basically the same.
Remove the backing off the CPO.
You now have a ticking timebomb in your hands...You will really only get one shot at the installation with this type of CPO. The Windex didn't help me one little bit. I made the mistake of trying to lift the CPO back up to readjust it, and the adhesive on this is really grippy. I ended up putting a small flaw into the artwork, when it separated from the adhesive. You wouldn't likely notice it unless you were looking for it, but be careful applying your CPO.
Then I flipped the Control Panel over, to deal with the sides of the artwork that needed to be secured.
For the rounded edge, I used a rolling motion to secure the side to the control panel.
For the flat edge, I pinched the artwork to the control panel.
I used the applicator to press out any remaining windex.
I used some clamps to hold the artwork in place, on the flat edge, as it's always tricky to get this part to stick properly.
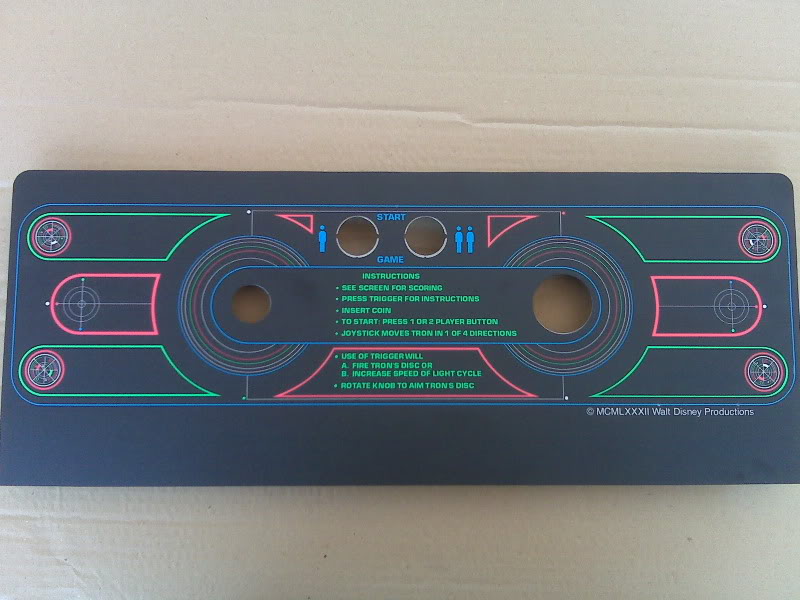
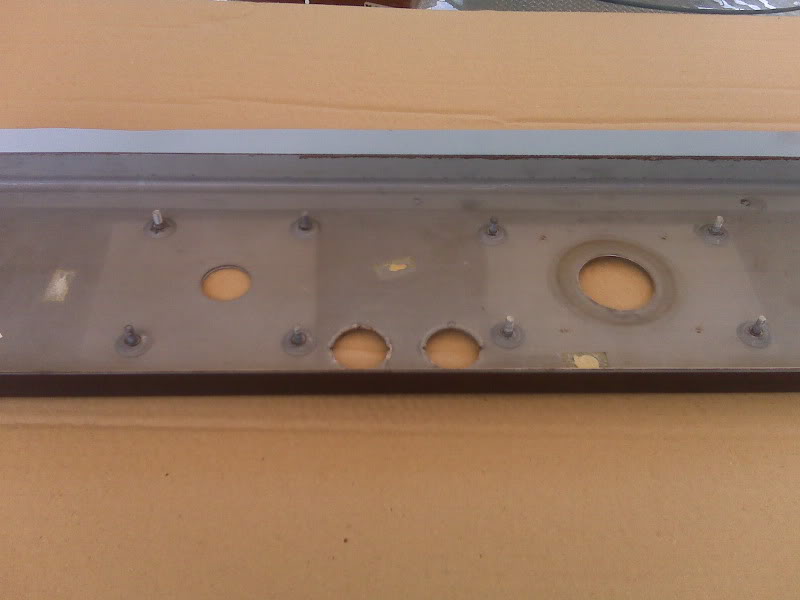
Here's what an old and restored control panel look like, side by side.
"My power comes from my boundless rage"
** Getting Out **All that's left: (Vids) Bubbles**MAKE AN OFFER!**
This time, someone thought it would be smart to cut the trigger wires halfway down the joystick shaft, and then use masking tape to hold everything together.
So..while I'm disassembling the control panel to put the new CPO on, the wires just pull apart, the masking tape having dried out completely years ago.
I pulled the wiring out of the joystick shaft, and cut them back.
I soldered new wires on, and fed them through the joystick shaft. I covered the joints with heat shrink tubing.
I covered the CPO with newspaper, as I was going to be soldering the switch onto the new wires, and didn't want to take the chance of dropping solder on it.
Then I actually reattached the switch. GroovyGameGear has a microswitch assembly, and I bought one, but it just didn't feel right...so I put the original switch back on.
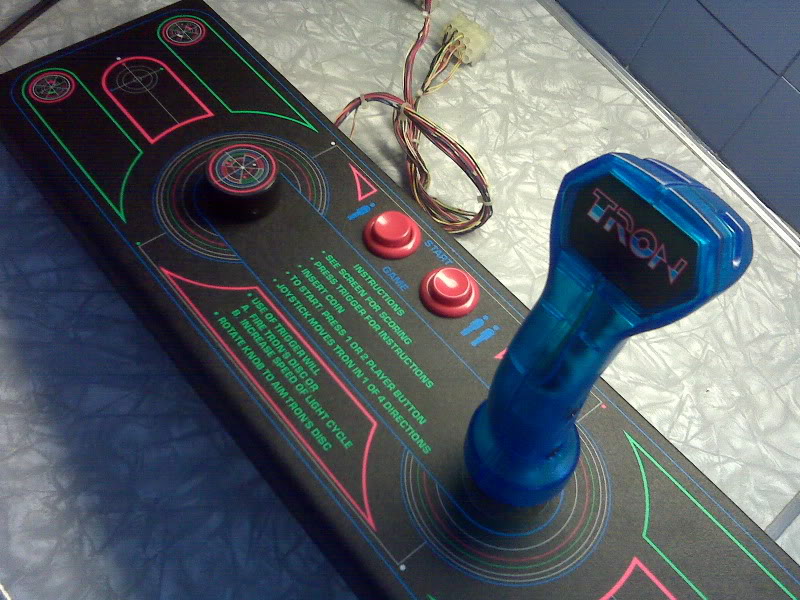
The finished control panel with the joystick fully assembled.
"My power comes from my boundless rage"
** Getting Out **All that's left: (Vids) Bubbles**MAKE AN OFFER!**
A thought on the CPO. When you are attaching the folded over part, you could also place a length of metal/wood along the side and clamp to it instead. That would provide pressure on the entire length of the overlay, not just in the three places where you have the clamps.
Ok, perhaps not the best explanation, but hopefully you get what I mean....
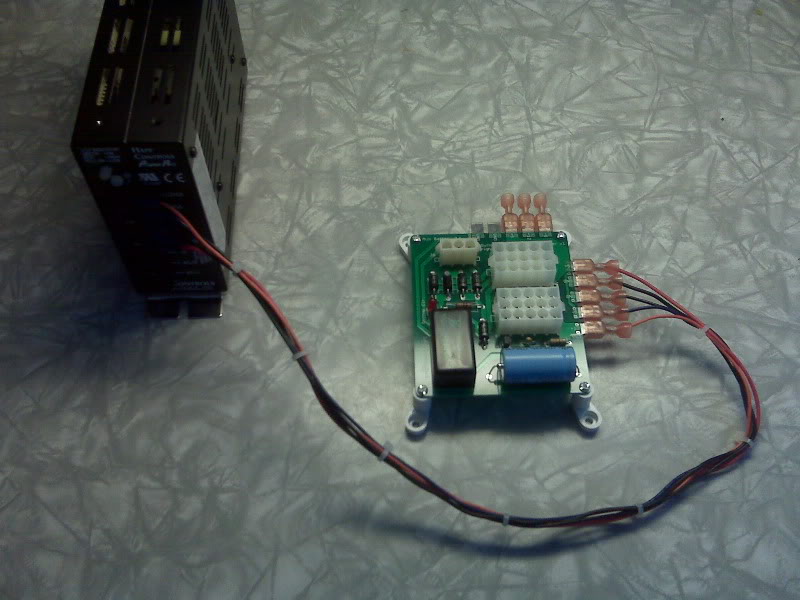
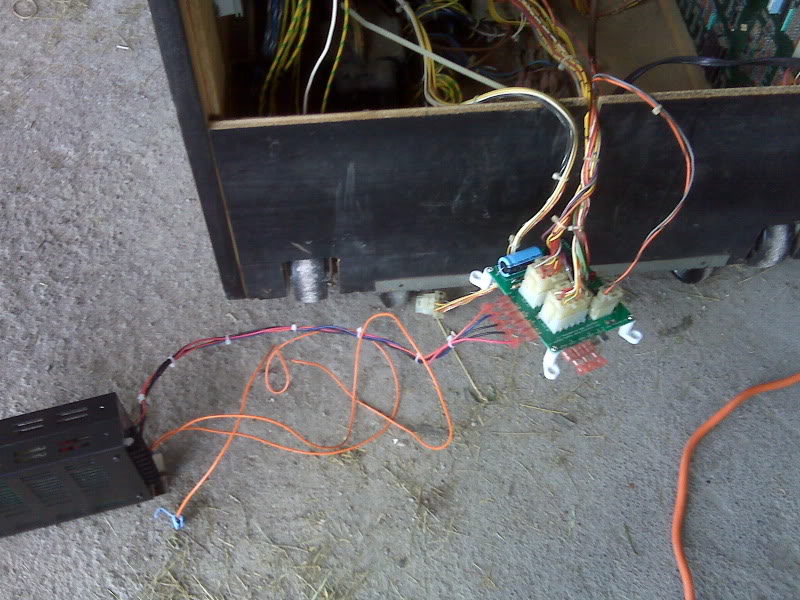
I bought the switching power supply adapter from Arcadeshop. It's a strange little thing...the instructions suggest it should be connected directly to your switching power supply (apparently, that's why there's two sets of "lugs", to make it compatible with more than one type of power supply). You're just supposed to line up the different voltages, and screw down the terminals on the switcher.
I have zero confidence that would work...you know over time, something would slip out of place, and your game would suddenly stop working.
Meanwhile, the second set of lugs would carry the same voltage levels, and be exposed in the cab. Not smart.
I made a harness that would go from the switcher to the adapter. I used .25QDs to connect to the lugs (I had to bend the insides of the QDs to make them fit over the lugs). I used a second set of QDs (not wired to anything) to carry the voltage carrying lugs.
"My power comes from my boundless rage"
** Getting Out **All that's left: (Vids) Bubbles**MAKE AN OFFER!**
I never play TRON in arcade back on those days, but I think I want one just because it's simply beautifull... I'm eager to see it completely finish...
Keep the good work and keep us informed!
Bye Gino
Bally Fathom, Centaur, Eight Ball Deluxe, Dolly Parton (for Lost vegas conversion project), Gottlieb Black Hole, Abra ca dabra, Game Plan Andromeda, Stern Flight 2000, seawitch, wurlitzer 700, 1900, rockola 1428, seeburg HF100R, vendo 44, midway monster gun, mystery score, mills High Top
I worked on installing the power supply this afternoon. The kit came with some quick Insulation Displacement Connectors (IDC), which you're supposed to clip onto the power wires for the monitor to get AC for the switcher.
Yuk!
I disconnected the Molex to the monitor, and removed the pins. I realized that someone had cobbled two different types of molex together, and it was so loose, it wasn't even making proper electrical connection. Could this be the reason the monitor wasn't working?
No such luck!
I de-pinned the molex, and then spliced the AC wires for the switching power supply into the AC wires for the monitor, and then repinned into the correct molex housing.
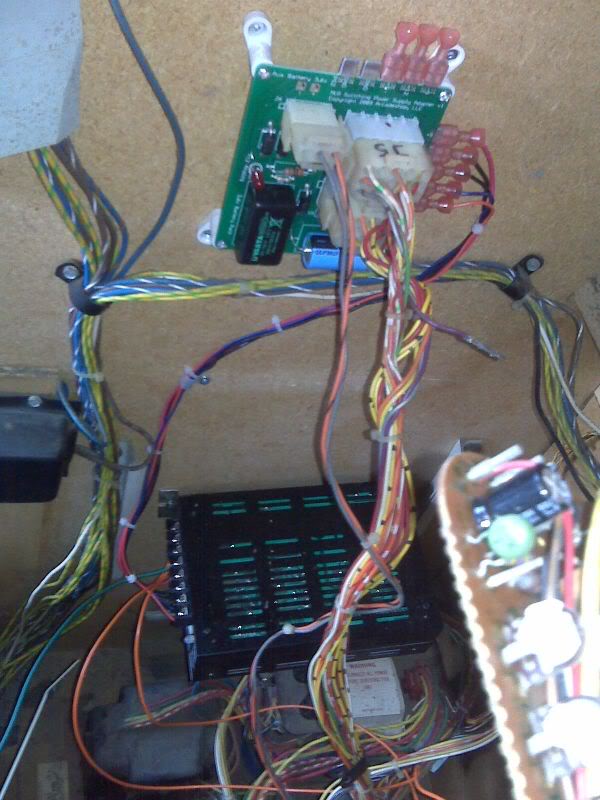
So..now the switcher has power. All the voltages checked out.
Time to mount everything in the cabinet. There's lots of room for it now that I've taken the linear power supply out.
"My power comes from my boundless rage"
** Getting Out **All that's left: (Vids) Bubbles**MAKE AN OFFER!**


 aerostarz

 Male
Male


 Logged


 MAACA ARCHIVES - JOIN THE NEW FORUM AT HTTP://WWW.MAACA.ORG › General Boards › Projects › Tron Restoration


