Many of you know I picked up a Tron at auction recently. Here's my repair log:
I'm slowly stripping parts off Tron to get it to the point where I can strip the inner sideart off, sand and paint...in preparation for the new inner sideart I ordered.
It's waaay too hot in the garage to do much though. A few minutes at a time is all I can manage.
Yesterday, I put castors on the bottom of the game to make it easier to move around. I took the curved plexi over the upper CP black light off.
Today, I took the lower CP bezel and light fixture off (really difficult to get the whole thing off, based on where the screws are mounted for it).
I swapped starters from the lower light to the upper light, and voila...I have black light over the CP. This tube isn't nearly as baked as the lower tube, so I get decent fluorescence out of it.
Here's what the machine looks like now:
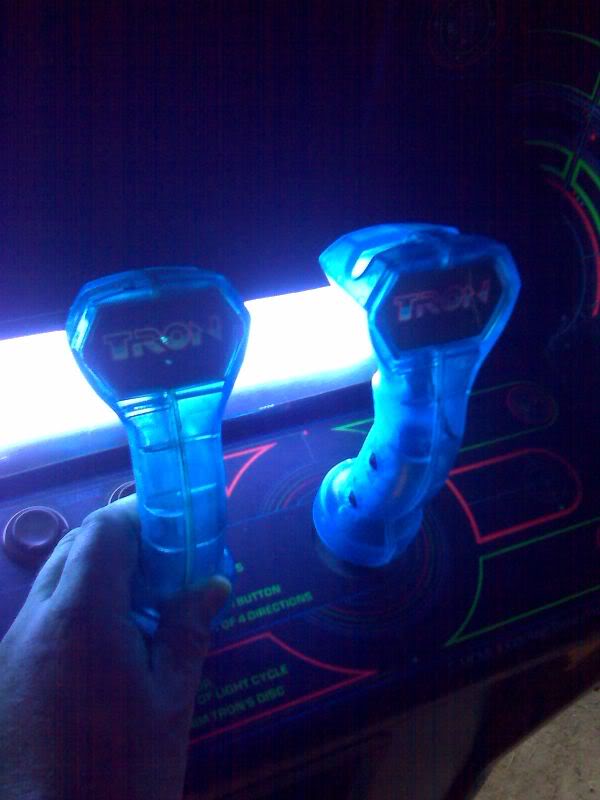
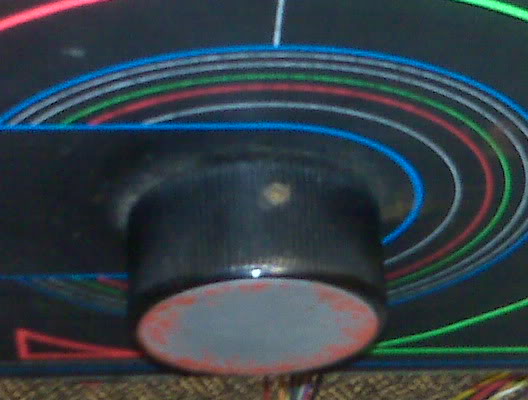
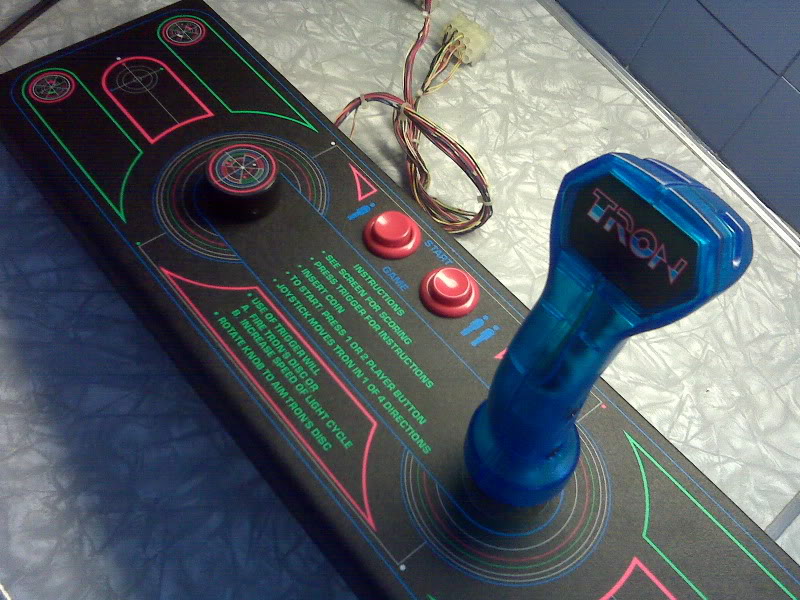
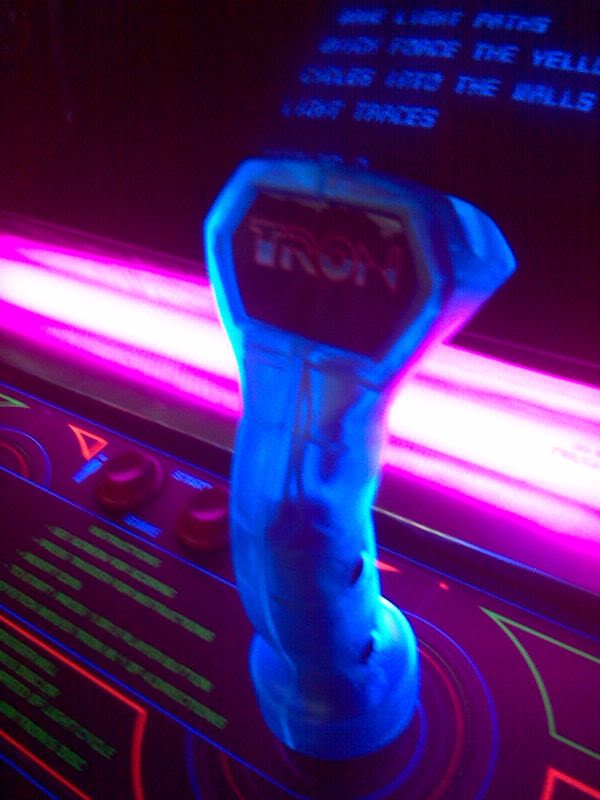
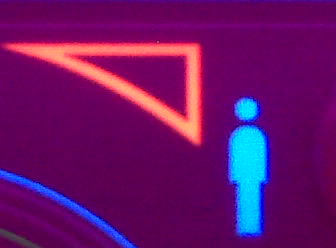
Some of you wanted to see the difference between the old joystick and new joystick under black light. This isn't the best picture, given it was taken with my cell phone, in the garage, and not in total darkness...but it will give you an idea.
The new joystick (right) actually fluoresces far better than the old stick (left).
I started fooling around with the connectors. The purple wire that goes to the power supply board (Connector J4, Row 1, Wire C) is a reset watchdog. I pulled it. Then I went and reseated all of the power supply connectors again.
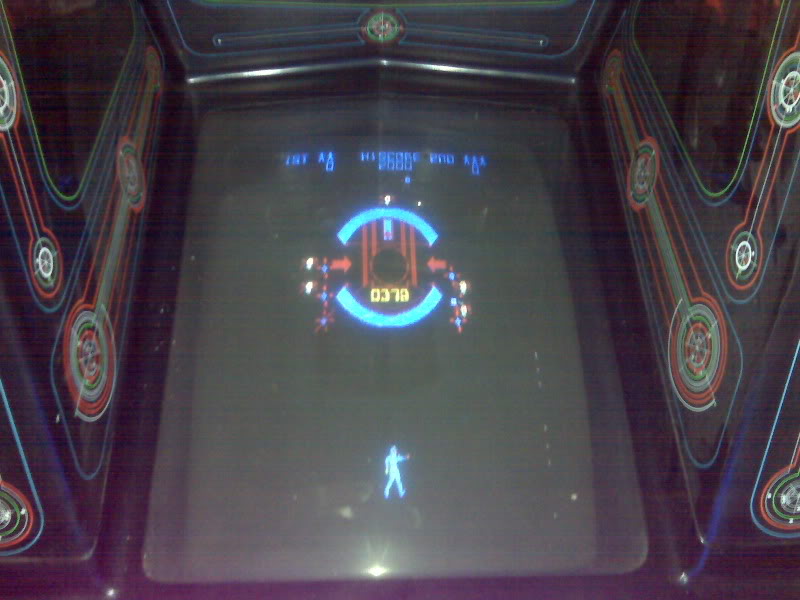
The game is playing blind again! P1 Start doesn't seem to work, and the left coin switch switch (looking at it as if the door was open) doesn't work.
I found out that I can beat the RGP lightcycles level without having to see what I'm doing!
"My power comes from my boundless rage"
** Getting Out **All that's left: (Vids) Bubbles**MAKE AN OFFER!**
Locking castors from Home Depot. They get the game a few inches off the floor...hopefully keeping any dampness off the bottom of the cabinet, and each wheel can lock in place so the machine doesn't move around during play.
I have this style of castor on each of my vids, and I've been happy with the results for several years now.
Tron is a pretty heavy cabinet, so I'm happy I don't have to try and muscle it around the garage anymore.
"My power comes from my boundless rage"
** Getting Out **All that's left: (Vids) Bubbles**MAKE AN OFFER!**
A trick I discovered for the lighted control panel art (above and below stick area), if you can't find repro's, is to buy some high quality florencent markers, and go over the lines with the respective colour ink. It really works... Not as good as repro's, but it will save you a couple hundred dollars.
maybe i'm just stupid, but check out crappy tire, they have a couple different sizes of the BLB bulbs and super cheap too, when you consider shipping from an online source, i betcha it'll fit.
Hey! You were right! I picked up a set of them, along with a pair of FS-2 starters tonight at crappy tire. The tubes were $6.99 each.
This is a 15W, Globe "EnerSaver" tube, type F15T8BLB. Oddly enough, it's the same tube number as the Sylvania bulb, but it's substantially more pale, and not as fluorescent.
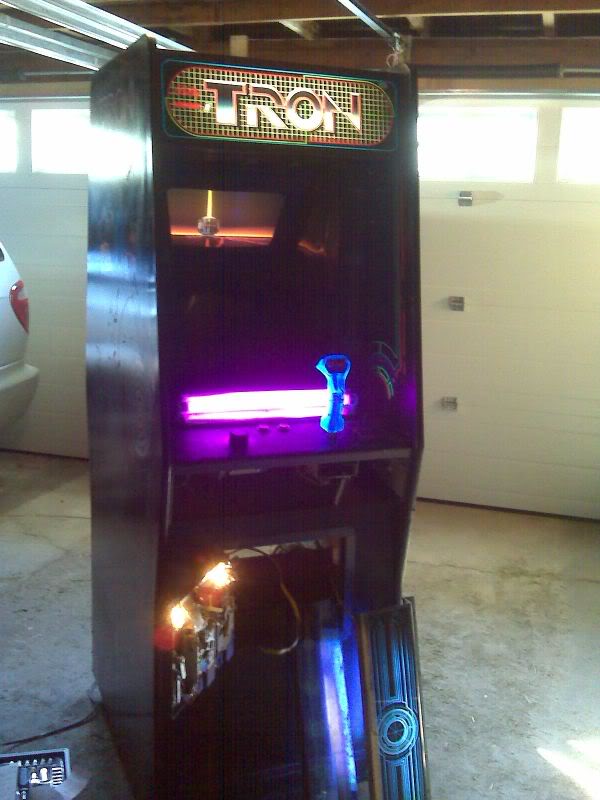
Here's what the machine now looks like with the proper "purple" blacklight mounted above the Control Panel. If you want to compare tubes, check out the plastic bezel leaning up against the machine.
The joystick really glows now!
I even got the translite to light up.
"My power comes from my boundless rage"
** Getting Out **All that's left: (Vids) Bubbles**MAKE AN OFFER!**
I just received my PhoenixArcade order today. 4 days from Indiana to my doorstep!
By contrast, I ordered some accessories from GroovyGameGear at the same time, and just got a confirmation e-mail that it shipped today. Oops.
As impressed as I am with the speed that the order was sent, I'm doubly impressed by the quality of the products.
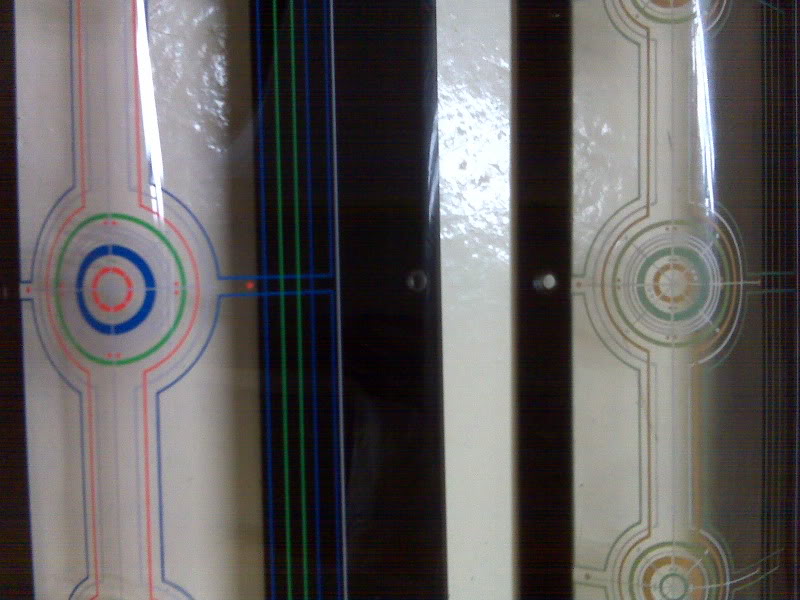
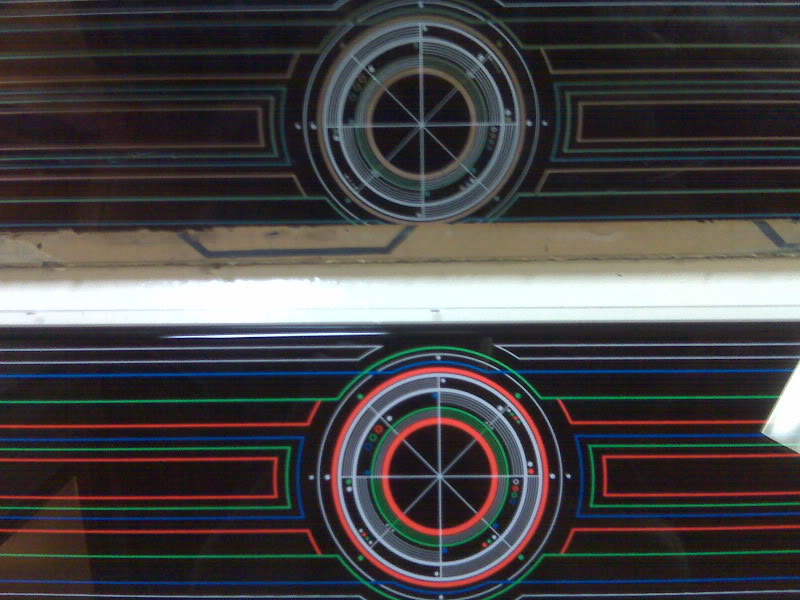
Upper CP marquee:
Close Up
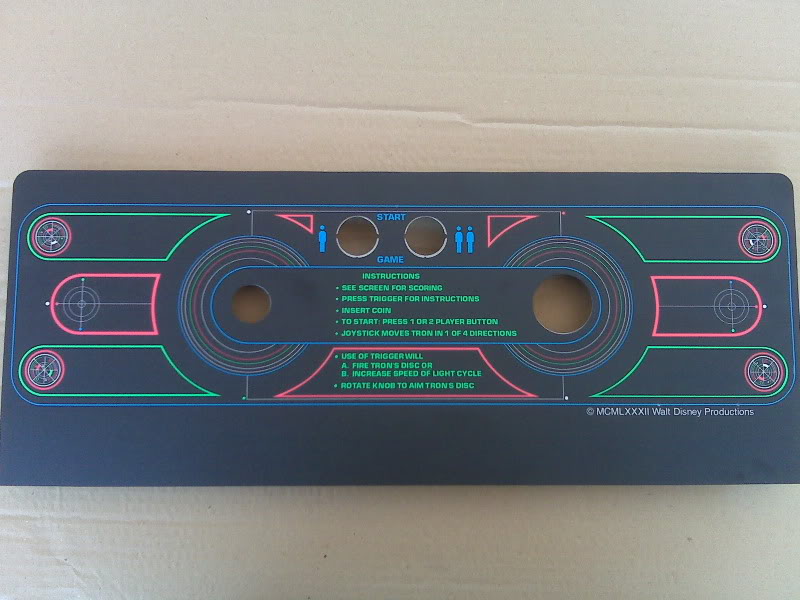
Lower CP Marquee:
Close Up
The lower CP Marquee has a part number on the edge...and although there are differences in the characters, you can tell it's the same person who did the handwriting.
The new plexi is much brighter than what was on the machine when I got it. It just shows you how much the blacklight will fade the graphics over time.
"My power comes from my boundless rage"
** Getting Out **All that's left: (Vids) Bubbles**MAKE AN OFFER!**
Phoenix arcade is top notch. Too bad they had that falling out with IPB. They would have been great at reproducing a lot more sideart. I guess they struck a deal with the devil (wayno) and now produce under his license.
More difficult than it seems. I was under the assumption that this little screw on the spinner was a Set Screw. It's actually a Roll Pin, and it doesn't matter what kind of hex key you use, you're not getting it to come out!
What you have to do is turn the control panel over, and remove both of these set screws on the bottom using a 5/64" hex key (allen key).
After you loosen both of these off, the spinner and shaft will come right out through the top of the control panel.
If you wanted to remove the spinner knob from the shaft at this point, you could remove the Roll Pin from the bottom of the spinner knob.
This took me at least an hour of ciphering before I figured it all out. Sheesh. Nothing's simple.
"My power comes from my boundless rage"
** Getting Out **All that's left: (Vids) Bubbles**MAKE AN OFFER!**
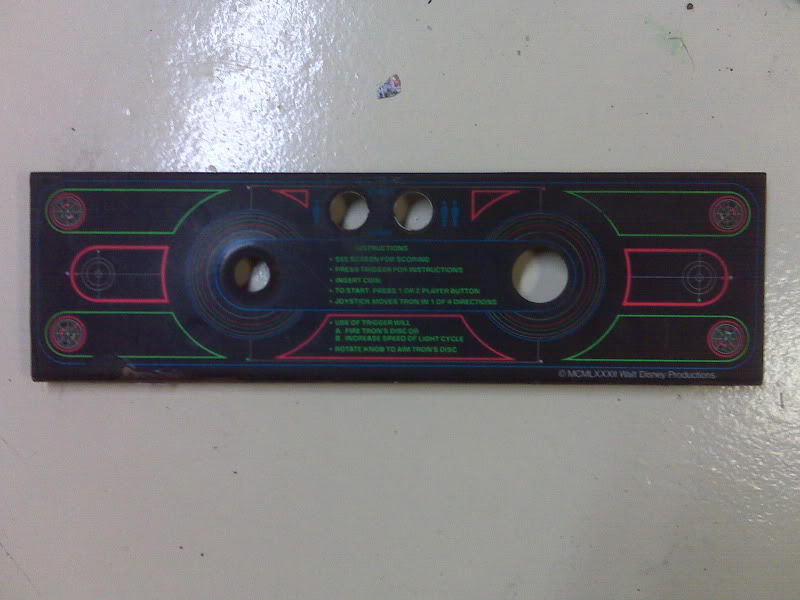
The original CPO definitely had to be removed, as there were several damaged areas:
My heat gun has a bunch of different attachments for the barrel. I chose a wide one with a very thin opening, to better direct the heat.
Incidentally, if you're looking to buy a heat gun, Canadian Tire has one on for $32.00 in a case.
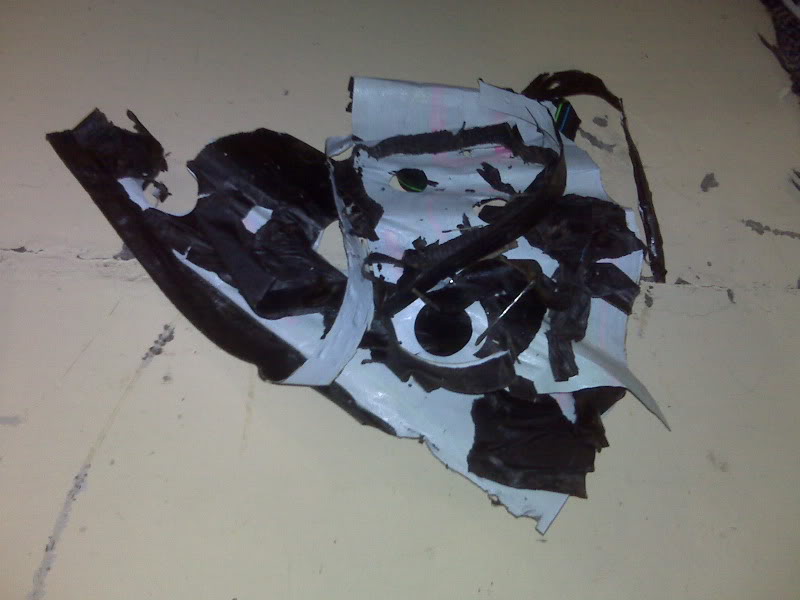
I heated a small area of the CPO, and used a putty knife to slide under it. The Tron original CPO has a thick black, almost rubbery adhesive. It was essential to get it all up, while it was still hot and pliable, as when it cooled, it stuck back onto the metal, and also to the putty knife. Nasty stuff to get rid of!
There's still a layer of sticky residue left on the control panel from the adhesive. I'll have to go out tomorrow, and see if I can pick up some "Goo Gone" or some other product that will get rid of it easier.
You can also see from some of the pictures, that the bolts that go through the control panel, used to bolt the joystick and spinner in place, are mounted in small depressions. On the original CPO, these left "soft spots", where you could press down on the overlay.
I'm thinking about filling these in with JB Weld, so these areas will be flush with the control panel. What does everyone think of that idea?
"My power comes from my boundless rage"
** Getting Out **All that's left: (Vids) Bubbles**MAKE AN OFFER!**
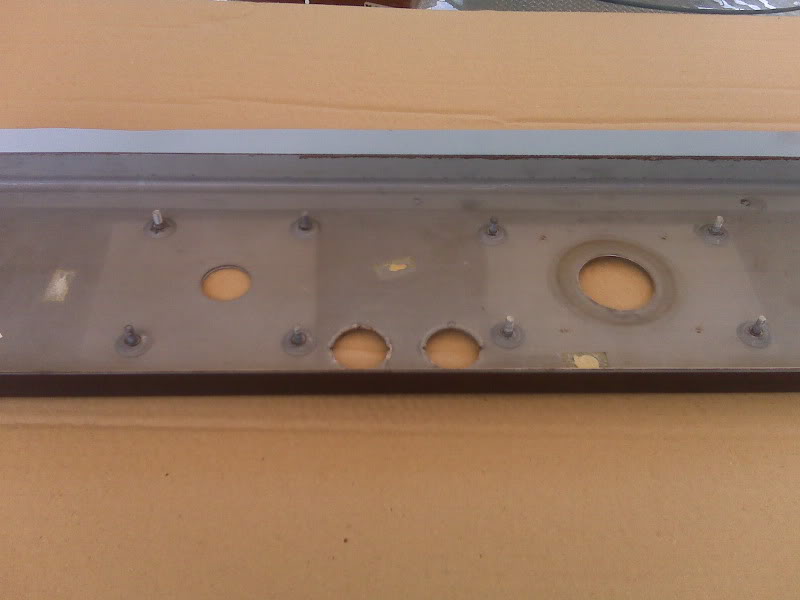
I mentioned the small divits where bolts had been pushed through from the top to the bottom side, so the joystick and spinner could be mounted on them.
Here is the top of the control panel after it has been sanded down around the divits.
I took cooke's advice (and others) and used bondo to fill them in.
I wasn't successful on my first pass through. This is the first time I've ever worked with Bondo. It's like working with a combination of toothpaste and fast drying cement. In the heat/humidity today, I only had about 2-3 minutes to work with it before it started to dry.
Lots of thunder while I was working outside. Bondo has a nasty odour, which begs for lots of ventilation.
I sanded, put a second coat on...sanded, and applied a third coat where necessary.
Tomorrow, I'll do the final sanding, and then I should be able to apply the overlay.
"My power comes from my boundless rage"
** Getting Out **All that's left: (Vids) Bubbles**MAKE AN OFFER!**
Oooh. A Tron patch would be pretty cool. I'm sure they have fluorescent material that would glow as you were playing a Tron game, and I know they have material you can use to make it glow in the dark too!
Any interest in a Tron patch? I'd buy my standard 5...so we need 45 more takers if you guys want this to go ahead.
"My power comes from my boundless rage"
** Getting Out **All that's left: (Vids) Bubbles**MAKE AN OFFER!**
Here are some of the tools I used to apply the new CPO:
Spray the surface of the metal control panel lightly with windex. This acts as a surfactant, and makes the CPO easier to move around. Some people like to use soap and water. It's basically the same.
Remove the backing off the CPO.
You now have a ticking timebomb in your hands...You will really only get one shot at the installation with this type of CPO. The Windex didn't help me one little bit. I made the mistake of trying to lift the CPO back up to readjust it, and the adhesive on this is really grippy. I ended up putting a small flaw into the artwork, when it separated from the adhesive. You wouldn't likely notice it unless you were looking for it, but be careful applying your CPO.
Then I flipped the Control Panel over, to deal with the sides of the artwork that needed to be secured.
For the rounded edge, I used a rolling motion to secure the side to the control panel.
For the flat edge, I pinched the artwork to the control panel.
I used the applicator to press out any remaining windex.
I used some clamps to hold the artwork in place, on the flat edge, as it's always tricky to get this part to stick properly.
Here's what an old and restored control panel look like, side by side.
"My power comes from my boundless rage"
** Getting Out **All that's left: (Vids) Bubbles**MAKE AN OFFER!**
This time, someone thought it would be smart to cut the trigger wires halfway down the joystick shaft, and then use masking tape to hold everything together.
So..while I'm disassembling the control panel to put the new CPO on, the wires just pull apart, the masking tape having dried out completely years ago.
I pulled the wiring out of the joystick shaft, and cut them back.
I soldered new wires on, and fed them through the joystick shaft. I covered the joints with heat shrink tubing.
I covered the CPO with newspaper, as I was going to be soldering the switch onto the new wires, and didn't want to take the chance of dropping solder on it.
Then I actually reattached the switch. GroovyGameGear has a microswitch assembly, and I bought one, but it just didn't feel right...so I put the original switch back on.
The finished control panel with the joystick fully assembled.
"My power comes from my boundless rage"
** Getting Out **All that's left: (Vids) Bubbles**MAKE AN OFFER!**
A thought on the CPO. When you are attaching the folded over part, you could also place a length of metal/wood along the side and clamp to it instead. That would provide pressure on the entire length of the overlay, not just in the three places where you have the clamps.
Ok, perhaps not the best explanation, but hopefully you get what I mean....
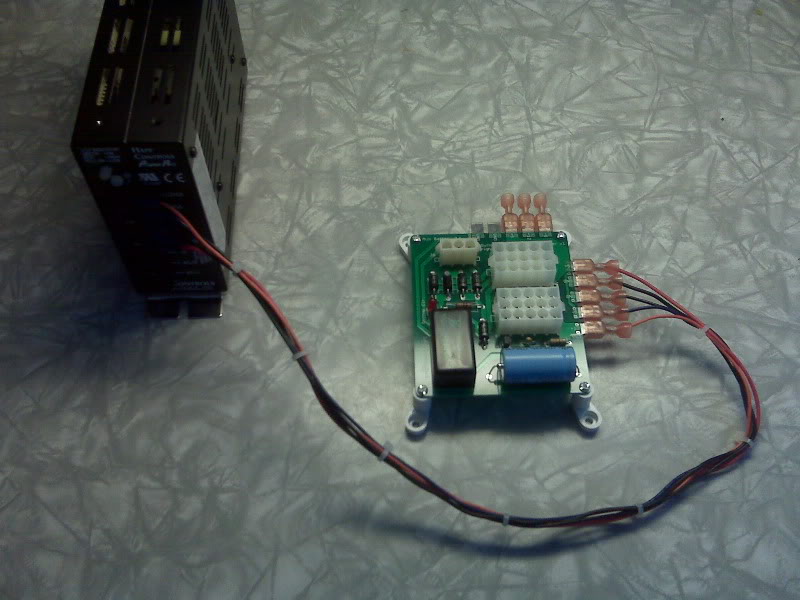
I bought the switching power supply adapter from Arcadeshop. It's a strange little thing...the instructions suggest it should be connected directly to your switching power supply (apparently, that's why there's two sets of "lugs", to make it compatible with more than one type of power supply). You're just supposed to line up the different voltages, and screw down the terminals on the switcher.
I have zero confidence that would work...you know over time, something would slip out of place, and your game would suddenly stop working.
Meanwhile, the second set of lugs would carry the same voltage levels, and be exposed in the cab. Not smart.
I made a harness that would go from the switcher to the adapter. I used .25QDs to connect to the lugs (I had to bend the insides of the QDs to make them fit over the lugs). I used a second set of QDs (not wired to anything) to carry the voltage carrying lugs.
"My power comes from my boundless rage"
** Getting Out **All that's left: (Vids) Bubbles**MAKE AN OFFER!**
I never play TRON in arcade back on those days, but I think I want one just because it's simply beautifull... I'm eager to see it completely finish...
Keep the good work and keep us informed!
Bye Gino
Bally Fathom, Centaur, Eight Ball Deluxe, Dolly Parton (for Lost vegas conversion project), Gottlieb Black Hole, Abra ca dabra, Game Plan Andromeda, Stern Flight 2000, seawitch, wurlitzer 700, 1900, rockola 1428, seeburg HF100R, vendo 44, midway monster gun, mystery score, mills High Top
I worked on installing the power supply this afternoon. The kit came with some quick Insulation Displacement Connectors (IDC), which you're supposed to clip onto the power wires for the monitor to get AC for the switcher.
Yuk!
I disconnected the Molex to the monitor, and removed the pins. I realized that someone had cobbled two different types of molex together, and it was so loose, it wasn't even making proper electrical connection. Could this be the reason the monitor wasn't working?
No such luck!
I de-pinned the molex, and then spliced the AC wires for the switching power supply into the AC wires for the monitor, and then repinned into the correct molex housing.
So..now the switcher has power. All the voltages checked out.
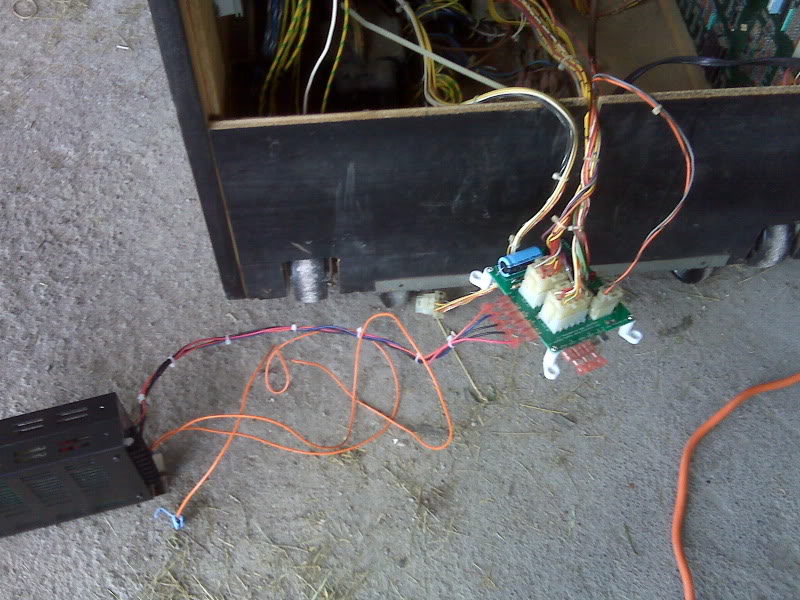
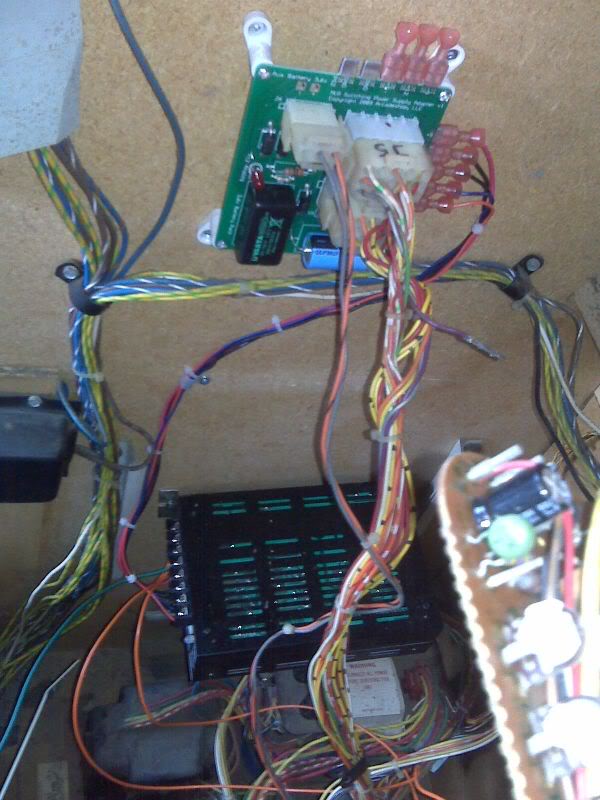
Time to mount everything in the cabinet. There's lots of room for it now that I've taken the linear power supply out.
"My power comes from my boundless rage"
** Getting Out **All that's left: (Vids) Bubbles**MAKE AN OFFER!**
I was going to pull my bench monitor out to the garage, and wire it up to an isolation transformer, then get a video extension cable and hook it up to Tron...but that all sounded like waaaay too much work.
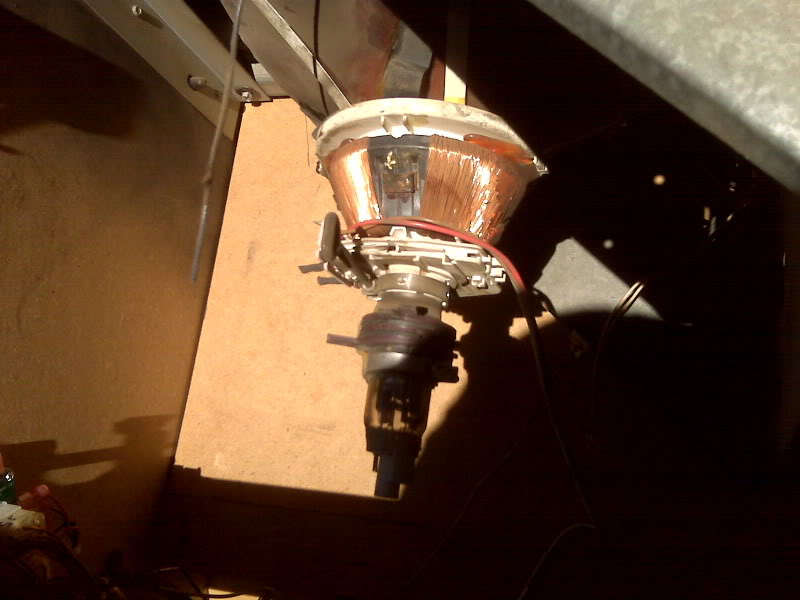
Since this was an Electrohome G07 monitor in the game, and I have several working chasis for G07s in parts, I figured it would just be easier to replace the chasis and take my chances that's what the problem was.
Here is the G07 with the original chasis out.
I took some time to go over the tube and wiring with a soft paintbrush to get all the dust and nicotine off everything. (I'm sure this has never been cleaned before, it was disgusting!)
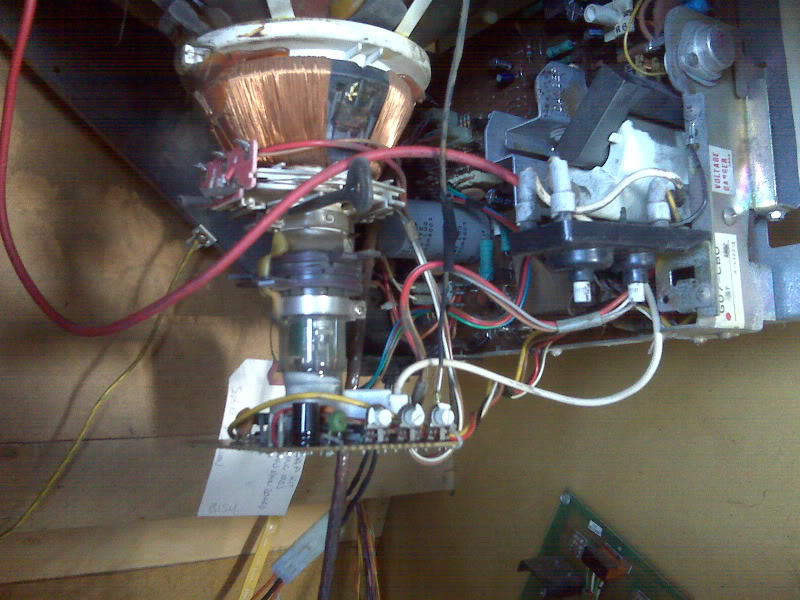
Here is the monitor with the new chasis in!
The moment of truth.....
I had to play around with the adjustments quite a bit to get the right size, shape, and brightness. I also had to turn up the "blue" cutoff a lot, to be able to see the grid in lightcycles, and gridbugs.
Ok... here's some beauty shots.... (Or as OTTOgd calls it...arcade restro porn).
"My power comes from my boundless rage"
** Getting Out **All that's left: (Vids) Bubbles**MAKE AN OFFER!**
I've gotten several messages telling me to try the volume control pot in the coin door.
I need to give you all some more information.
The linear power supply has 4 connectors. When I added the switching power supply and adapter, it only uses 3 of the 4 connectors...the other one is just disconnected.
I think that the volume pot in the coin door is somehow routed through this 4th connector.
When I was still running the linear board, I was able to use the volume pot in the coin door to lower the volume level, so I know it was working properly.
Now, it just seems "disconnected" rather than "broken".
I'm thinking there has to be a volume pot on the circuit board as well somewhere. The manual alludes to this, but I only have the "preliminary" manual, not the full production manual.
Does anyone have more experience with this than I do?
"My power comes from my boundless rage"
** Getting Out **All that's left: (Vids) Bubbles**MAKE AN OFFER!**
I'm thinking there has to be a volume pot on the circuit board as well somewhere. The manual alludes to this, but I only have the "preliminary" manual, not the full production manual.
Does anyone have more experience with this than I do?
Bish,
I'll get off my lazy a** and dig out my complete manual set and see what I can find for you, but I don't recall the PCB stack having any sort of volume control...
Any response back from Arcadeshop on the volume issue?


 Bish
Bish

 Male
Male


 Logged


 MAACA ARCHIVES - JOIN THE NEW FORUM AT HTTP://WWW.MAACA.ORG › General Boards › Projects › Tron Restoration


